Showing posts with label Tutorial. Show all posts

Tuesday, June 30, 2020

How to Make a Homemade Taco Swing

A tutorial for making your own taco swing for kids. This DIY sensory swing is pretty easy to make and tons of fun for the kids!

I made a homemade taco swing for my boys for Christmas and I have been so excited to share the tutorial with you. 

The actual sewing and assembly of this swing went so smoothly that I actually impressed myself by how well it came together...haha 

From start to finish, this DIY taco swing took me about a hour to make. And I was hoping to do it for under $50. Well, not only does the final product look and work amazing, but I made it for about $25. 

How much does a store bought one cost, you ask? 

Only a whopping $175-300! 

So yeah...how about that tutorial then?

Homemade taco swing tutorial - how to make a sensory swing for kids from scratch!

Important Safety Precautions & Reminders for DIY Sensory Swings for Kids

I know some of these seem obvious, but I will state these reminders clearly.

  • Do not use stretchy fabric for this swing. 
  • Make sure the thread strength matches the fabric used. Also, make sure you use the appropriate needle on the sewing machine!
  • Always test homemade swings first before letting children play with them.  
  • Do not leave children unattended in swings. 
  • Put swings away when not in use. 
  • Make sure the swing is in a clear, unobstructed space. 
  • I am not responsible for injuries or damage pertaining to or caused by this homemade swing. 
  • Please use at your own risk.

Taco swing DIY tutorial

Homemade Taco Swing: What You'll Need

Here's what we used to make this gorgeous DIY sensory swing:

  • 1.7 metres (1.9 yards) of canvas or other non-stretchy fabric - I found this beautiful striped fabric on clearance and paid $10. I did not end up using all of the fabric so I will save the huge scraps for another project!
  • 1" thick wooden dowels - We used two that were 36" long and paid $5 in total from Michaels using two 50% off coupons. More details to follow.
  • Carabiner hooks - We used ones that could hold 100+ lbs each. I think we paid around $8 for two hooks.
  • Drill with 1/4" drill bit

A homemade taco swing for kids

Some Special Tips & Notes About Making this Taco Swing for Cheap!

We went fabric hunting as a family hoping to find a perfect fabric for our swing on clearance. We lucked out and bought some pretty striped fabric. And it's not even hideous fabric or a plain boring color!

However, if you can't find any fabric you like to fit your budget, then why not try using canvas drop cloth as an alternative. It's 100% canvas and is fairly cheap to buy. It was going to be our back-up plan until I found the striped fabric.

When I originally priced out wooden dowels at Rona, it was going to cost me $20 just for that part... 

Well, enter the ever-brilliant husband: "Does Michaels carry wooden dowels?" I knew that I had seen them before, but I had never looked closely at them. 

The answer is yes! 

Michaels had 1" wooden dowels precut to 36" long. And to make things even sweeter, their coupon for the week was 50% off an original price item. So we ended up buying our wooden dowels for $5, plus we didn't have to worry about cutting them!

Okay, okay, now that I shared some of our tips for making this taco swing, it's time to move on to the tutorial, right?
Colorful taco swing for kids + tutorial so you can make your own

How to Make a DIY Taco Sensory Swing

1. Our dowels were much shorter than the width of our fabric. So I cut the fabric to be about 40" wide, just slightly larger than the length of the dowels (36").

2. Fold the edge of the fabric along the long side of the fabric and tuck the raw edge inside. You'll likely use about 2"-2.5" worth of fabric for this hem. Pin and sew. This edge will be the front (or back) of the swing.

3. Repeat on the other long edge, making sure that the finished rectangle is shorter than the length of the dowel.

4. Now we need to make pockets for the wooden dowels. Fold the fabric around the wooden dowel, tucking the raw edge inside, to create the pocket. Don't make the pocket too tight! Pin into place. Remove the wooden dowel. Then sew.

5. Repeat step four on the remaining edge of the fabric.

6. Drill two holes in each wooden dowel, about 1" in from each end.

7. Determine the length of rope you will need. This step depends on the height of your space. Our swing hangs in an extra-wide doorway so we used about 70" of rope per side. You will use one solid piece of rope per side.

8. Put a piece of tape on the end of a piece of rope. It makes threading the rope so much easier! Plus it keeps the rope from fraying. Tie a knot or two on the underside of the dowel. Repeat for all four holes. See picture below.

How to make a taco swing for kids

9. To attach the carabiner hook, locate the middle of the rope for each side. Loop the rope around the carabiner hook. See picture below.

How to make a taco swing for kids

10. Now that the swing is assembled, you will need to install some hardware to hook the swing onto (if you don't already have a swing set-up in your house). You can get a better view of our swing hooks here. We use two eye bolts (about 18" apart) screwed into the frame of a large doorway. Swing hooks should always be installed into a ceiling joist or door frame.

11. Test it out! Before I ever put my own children in a homemade swing, I always test the weight limit myself. The swing held me comfortably. I also had my husband try it out, but he was definitely just too much for our swing to hold. He's roughly 175 lbs.

Storing & Playing with the DIY Taco Sensory Swing

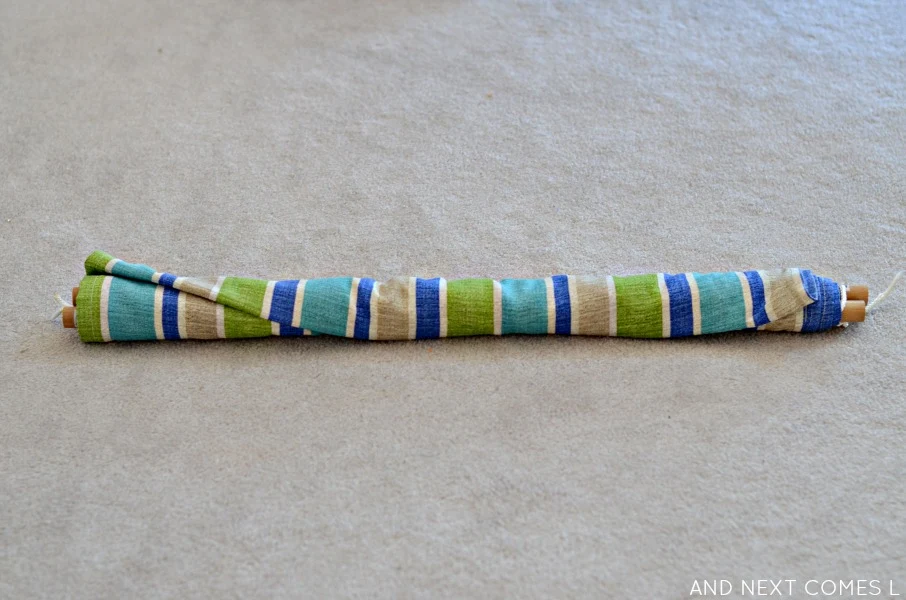
The wooden dowels make it easy to store the finished swing. Simply roll it all up around the wooden dowels and voila!

Storing a taco swing

But more importantly, it works amazing! You can fly it in by laying on your tummy.

Swinging in a homemade sensory swing

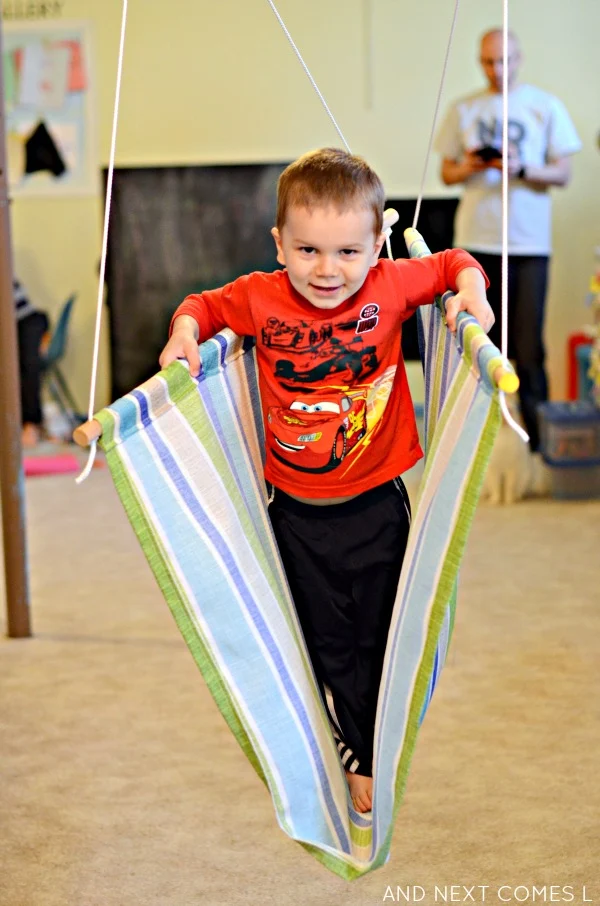
Or you can encourage a good core workout and balance by standing in the swing. This type of play is better for older kids.

Swinging in a homemade sensory swing

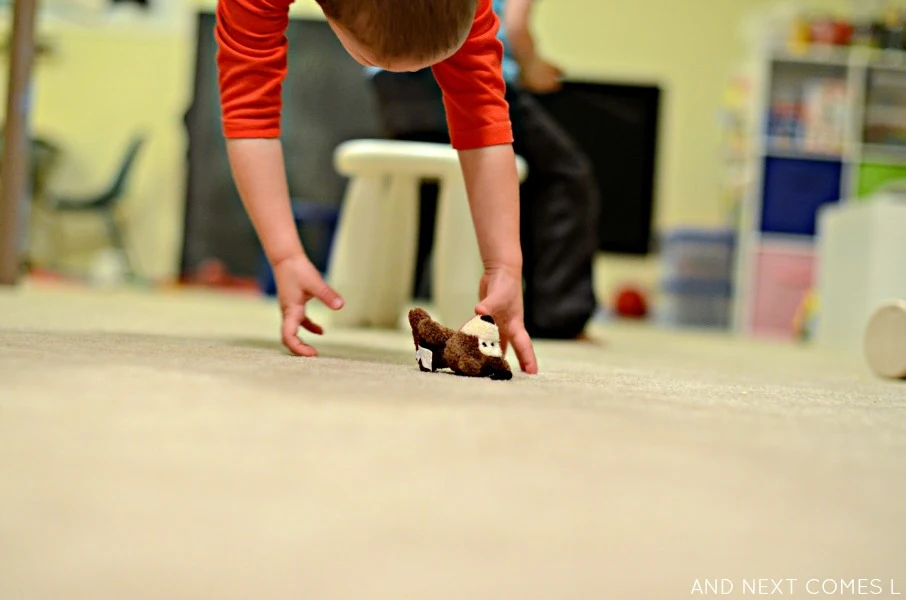
Our favorite way to play is to swing while laying on the tummy, picking up toys, and throwing them at a target. It usually results in the most giggles too!

Swinging in a homemade sensory swing

Other DIY Sensory Swings You'll Love

DIY Woven Wrap Sensory Swing


Continue reading "How to Make a Homemade Taco Swing"

Friday, June 26, 2020

DIY Woven Wrap Sensory Swing

This DIY indoor sensory swing is so easy to make! Find out how to make a swing using a woven baby wrap.

Installing a swing in our basement has been a lifesaver, especially with our long cold winters. It's such a great way for kids to burn off excess energy and regulate their bodies.

We have a few different swings that we can switch between, but we didn't yet have a good sensory type swing. They're often quite expensive.

But, after supper one evening, I thought about whether or not a woven wrap could easily convert into a sensory cuddle swing. Turns out, it works awesome and the boys are addicted to it!

So here's how to convert a woven wrap into a DIY indoor sensory wing.

How to make a swing using a woven wrap baby carrier

What You'll Need for this DIY Sensory Swing

Babywearing has been a huge part of my life, especially since K was born. One of my favorite baby carriers is the gorgeous Ellevill Zara Deli woven wrap that you can see in the pictures. I converted it into a swing without having to make any modifications to the wrap itself. We have also used a stretchy baby wrap to make this sensory swing before (just using extra knots).

Here's what you'll need to make this sensory swing:

  • Woven wrap baby carrier
  • Eye bolts (I forget the size, sorry!)
  • Carabiner hooks (ours hold up to 300ish pounds each)

Important Things to Note When Making Your Own DIY Indoor Sensory Swings for Kids

Before I show you how I set up this swing, I need to include a disclaimer and mention a few safety notes.

  • It is highly recommended that you use a woven wrap for this swing. 
  • Please do not substitute a sheet or blanket.
  • A stretchy wrap baby carrier can also be used, but requires extra knots and careful supervision. But please use your discretion as stretchy wraps do not hold knots as well as a woven wrap.
  • Always be sure to test the swing yourself, ensuring the wrap is well knotted, before putting your child in it.
  • Put a crash pad or mat underneath for safety or hang it low enough that your child can easily touch the ground beneath them.

How to Install a Sensory Swing Indoors

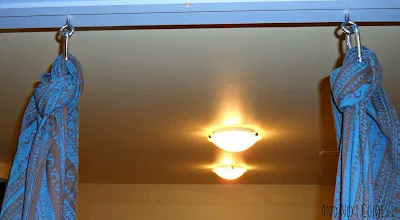
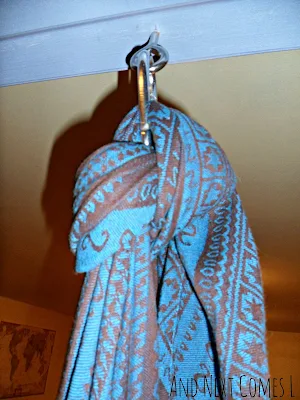
Our swing is set up in a wide doorway by screwing two eye bolts (sorry, I don't recall the size off the top of my head!) into the frame. Then we used carabiner hooks that can each hold up to 300 and some odd pounds. You can see the set up below.

How to install a sensory swing indoors

I knotted my woven wrap around the carabiner hooks, making sure that the knot is nice and tight. Be sure to test the swing after it is hung. If it can hold an adult up, then it can safely support a small child.

How to install a sensory swing indoors

Once you have it securely knotted and tested that it can support your own weight, you can put a child in the swing.

How to make a sensory swing from a baby wrap

A Kid Approved Sensory Swing!

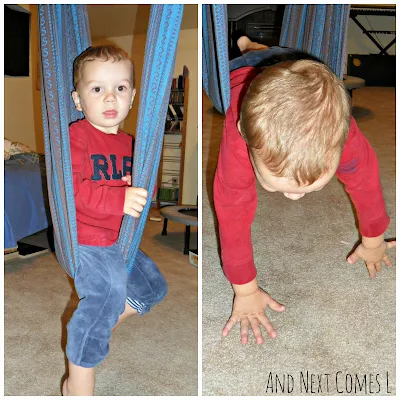
The boys love this new swing and have tried sitting in it in various ways. I have also tried tying the wrap in different ways to make different "seats" for them to sit on. For instance, J enjoys using it like a hammock, but also enjoys sitting it in and spinning around.

Tutorial for a DIY indoor sensory swing for kids

K, on the other hand, likes to use it to fly like an airplane or sit in it like a jolly jumper.

Tutorial for a DIY indoor sensory swing for kids

Other Sensory Swings You'll Love

Homemade Taco Swing

Continue reading "DIY Woven Wrap Sensory Swing"

How to Make a Big Homemade Parachute for Kids

DIY parachutes are totally something you can make on your own. Here's how to make a homemade parachute for kids using dollar store shower curtains.

I think I'm rather genius for making this homemade parachute, especially since it's a fraction of the price of a store-bought one. I ended up making it for only $6 using shower curtains found at the dollar store.

Yes, $6!!

The inspiration came to me a few months ago...we have a shower curtain that we use as a splat mat for K when we eat in the dining room as we have light colored carpet in there (who puts white carpet in a dining room in the first place??). I was attempting to fold the shower curtain when K started lifting it and wiggling it. So I started moving it up and down like a parachute. He thought it was awesome and couldn't stop laughing. And that's when I had my aha moment!

I wondered...could I make a big play parachute out of shower curtains?

Obviously the answer is yes!

Here's the tutorial for how to sew a parachute out of dollar store shower curtains.

Tutorial for how to sew a parachute that's roughly 10' in diameter


Homemade Parachute: What You'll Need

The overall cost for this DIY parachute is pretty low considering I used materials from the dollar store to make it happen. As I mentioned above, I only spent $6 on materials.

It's also rather large. This tutorial will help you make a parachute that is roughly 10' in diameter.

Here's what I used to make this homemade play parachute:

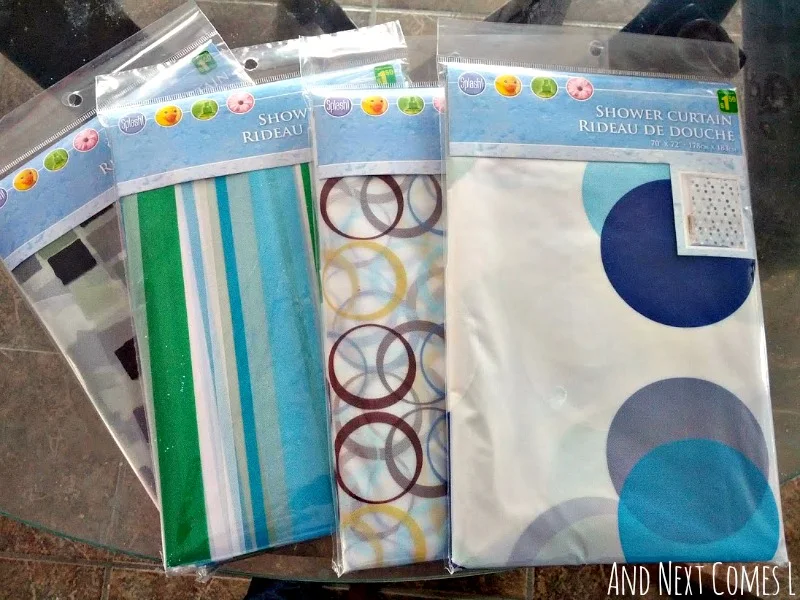
  • 4 shower curtains (not fabric ones) - I paid $1.50 for each one.
  • Scissors
  • Sewing machine
  • Thread in a coordinating color

Supplies for how to make a homemade parachute

Tutorial: How to Make a Big Play Parachute for Kids

I should mention that I am terrible at taking photos while I make any project so I do not have pictures for every step in the tutorial. So hopefully I can describe the process clearly enough.

It took me about 2 hours to make the entire parachute.

Step 1: Find the top of the shower curtain where the curtain hooks would go.  Cut that part off.  Repeat for all four shower curtains.

Step 2: Lay the shower curtain on the floor and fold diagonally (i.e., match top left corner with bottom right).  Cut along the fold.  Repeat for all four shower curtains.  You should end up with eight pieces.

Step 3: Lay out all the pieces on the floor (or outside if you need more space).  Be sure to organize it in the order that you want the final parachute to be.  When all the pieces are laid out, it should form a rectangle.

Step 4: Pick two neighboring pieces to start with.  Sew the right sides together.  I used a 4/8" seam allowance.  Well, I tried to...I don't always sew straight.

Sewing a big DIY parachute

Step 5: Find the next piece and sew right sides together.  Repeat until all eight pieces have been sewn together.  It should form the large rectangle that you had laid out back in step 3.  It was at this point that I realized that my crazy idea was actually working out!

Making a DIY parachute for kids

Step 6: (Optional) Fold the rectangle until it forms a large diamond, with the center of the parachute at the top.  Try to flatten the material as best as you can.  Cut the top of the diamond in a semi-circle shape.

Homemade parachute tutorial

How to make a play parachute for kids

Step 7: (Optional, but necessary if you decided to do step 6) Unfold the diamond so that you return to your rectangular parachute.  There should now be a circle in the middle of the parachute.  Sew a hem along this inner circle.

How to make a play parachute

Step 8: Cut your entire parachute into a circle.  This step took a few practice cuts on a piece of folded paper before I figured out the easiest way to cut the parachute.  I didn't want to screw it up, so that's why I practiced with paper first.  I suggest you do the same.  Or lay the parachute out fully and cut it in a circle that way.  Do whatever is easiest.

Step 9: Hem the outer edge of the parachute.  I made a really huge hem so that the kids would have a better spot to hang onto when playing with the parachute.

Step 10: (Optional) Make handles using the scraps and sew them onto the parachute.  I didn't make handles (too lazy!) and the kids have had no problem hanging onto the parachute so that's why this step is optional.

That's it! You did it. You made a big play parachute!

A DIY parachute that's 10' in diameter

DIY Parachute: The Finished Result!

The parachute ended up being approximately 10 feet in diameter, so it is quite large.

We can play with it in our basement (which will be perfect for rainy days and cold winter days), but I can't wait to use it outdoors. Now if only the snow would go away...

I tried numerous times to take a picture of the parachute in action, but the kids ended up all blurry and I had to help hang onto the parachute. Regardless, here are a few pictures to show you what it looks like.

Here is how large the parachute is in comparison with an 18 month old toddler.

A homemade play parachute for kids - a DIY tutorial

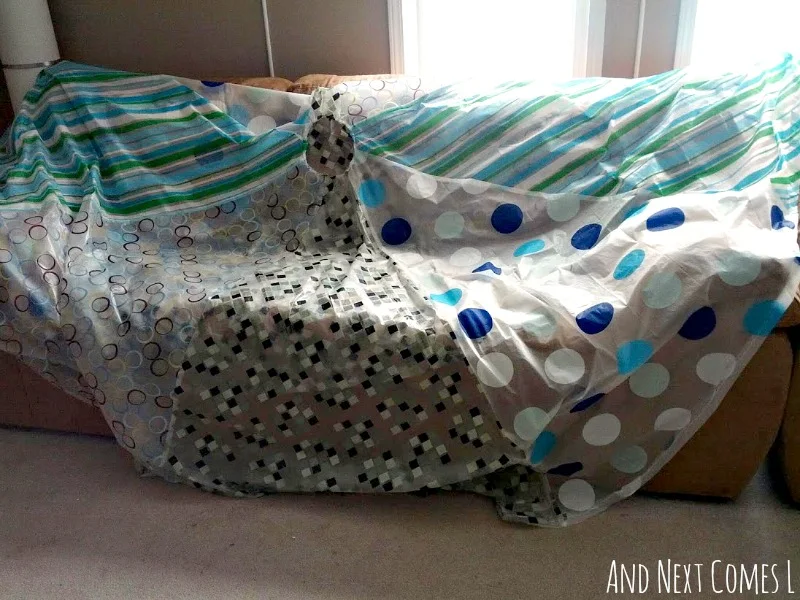
Here's the parachute, folded in half, laying on my couch.

A homemade play parachute for kids - a DIY tutorial

Final Thoughts on this DIY Parachute

I love how well this parachute turned out. It's so bright and cheery!

And the fact that it's translucent is a bonus because I can always tell where a child is underneath it.

It's also homemade and inexpensive, which are two more reasons to love it.

**DISCLAIMER: Never leave your child unattended with the parachute.  It's essentially a gigantic plastic bag.**

Other DIY Sensory Tools & Autism Hacks You'll Love

DIY Mario Climbing Wall


Continue reading "How to Make a Big Homemade Parachute for Kids"

Thursday, February 07, 2019

DIY Color Blocks for Kids

Tutorial for how to make your own set of DIY color blocks for light play. A video tutorial is included.

My kids enjoy playing with light, whether it's exploring natural light or mirrors or playing with our DIY light table.

So oftentimes, I find myself creating homemade materials to aide them in their curiousness of light play.

These DIY color blocks are just one of the many homemade light table toys that I have made. At just a fraction of the cost, these color blocks can be made in just a few minutes with simple materials from the dollar store.

They're so pretty and way cheaper than the store bought versions.

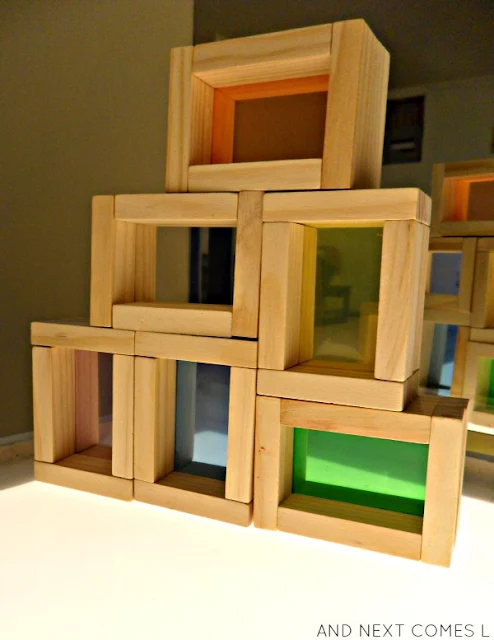
Tutorial for making DIY homemade color blocks for light play

About Our Homemade Color Blocks for Light Play

I have always admired color blocks.  I think they are gorgeous on light tables and overhead projectors, but even more beautiful in natural light.  I just don't like the price tag that goes along with them.  Sure, color blocks aren't all that expensive, but when you think about what they are actually made of, I figured I could make something similar for much cheaper.

And I did!

My price tag: $3.00.

DIY color blocks tutorial - made from dollar store items for only $3 from And Next Comes L

Only three dollars?!  Well, actually I could have done it for $1.50 if I had bought my supplies at the dollar store versus the liquidation center.  Next time...darn it...next time!

Tutorial for How to Make DIY Color Blocks from Dollar Store Wooden Blocks

To make these blocks, you will need a game of wooden tumbling towers (aka Jenga).  Mine were $3.00, but like I said, I found them cheaper at the dollar store.

You will also need some colorful translucent duotangs or transparencies (also found at the dollar store).  I used the leftover transparencies from my homemade light table manipulatives.

Then grab some scissors and your hot glue gun.  I promise these are really easy to make.

To make one block, you will need eight wood blocks from the tumbling towers "jenga" game and a piece of colored transparency.

1. Arrange four blocks into a square shape and hot glue gun it together so that it looks like a picture frame.

2. Cut a piece of transparency so that it's big enough to cover the middle of the "picture frame."

3. Lightly glue the transparency into place, just so that it won't move on you.

4. Then create another picture frame shape with the remaining four blocks.

5. Hot glue it onto the picture frame with the transparency on it.  I didn't take pictures along the way, but you can always watch the accompanying video tutorial for an overview of how to assemble the blocks.


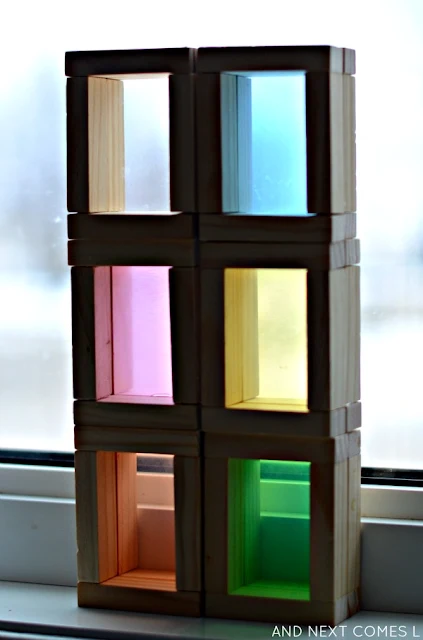
Repeat multiple times, using a different colored transparency for each block.  I ended up with six blocks in each of the following colors: orange, yellow, clear, green, blue, and purple.

Stacking DIY color blocks in natural light from And Next Comes L

Playing with our Homemade Color Blocks for Kids

The only downside (or limitation) to my homemade version of the color blocks is that I could only make little rectangles or squares.  No semi-circles or triangles for me, but I'm okay with that because I love how mine turned out.  And more importantly, the boys love them!

They work great on the light table.

Tutorial for making DIY color blocks for light table play from And Next Comes L

Tutorial for making DIY color blocks for light table play from And Next Comes L

They would also work great with the overhead projector, but I think I love them the most in natural light. Seriously, look at how wonderful they look in front of a window.  Gorgeous!

DIY color blocks tutorial - made from dollar store items for only $3 from And Next Comes L

Stacking DIY color blocks in natural light from And Next Comes L

Stacking DIY color blocks in natural light from And Next Comes L

And that's it!  Simple, frugal, and fabulous!

Other Ideas You'll Love


Tutorial for making DIY homemade color blocks for light play
Continue reading "DIY Color Blocks for Kids"

Saturday, April 18, 2015

DIY Metallic Dyed Mini Blocks

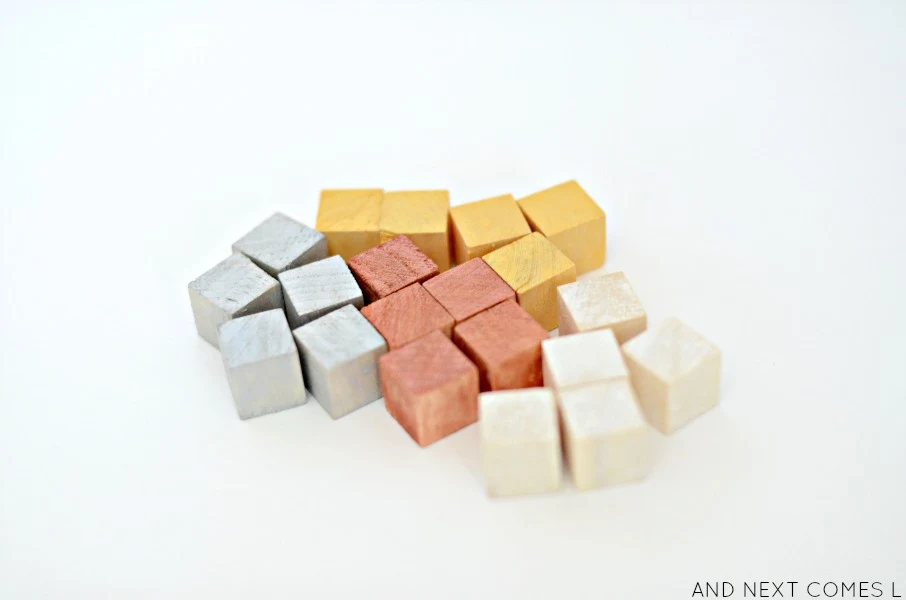
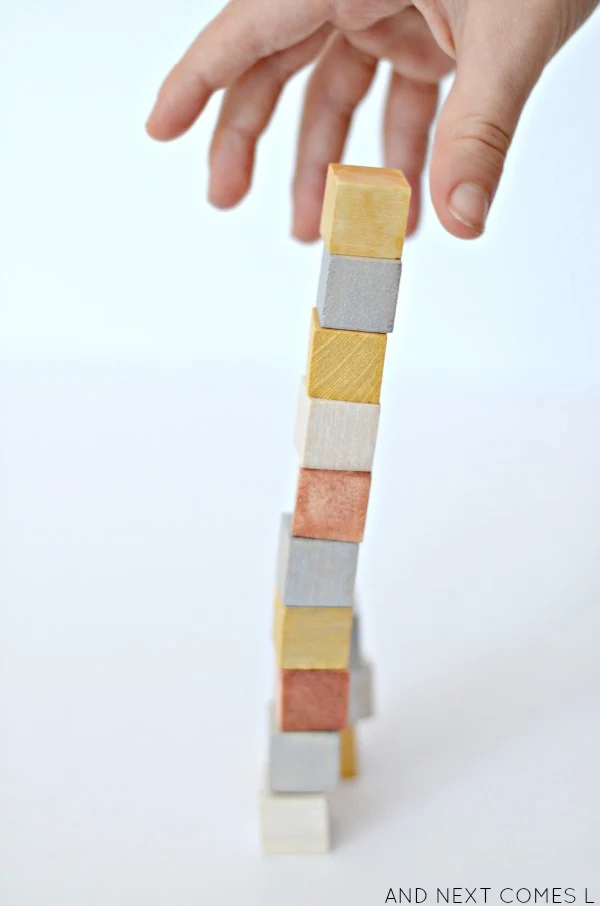
I've already confessed my addiction to metallic liquid watercolors when I shared these metallic dyed beans, but then I went on dyeing more and more stuff. This time I transformed some mini wooden cubes into some metallic dyed mini building blocks. They're great for building with or for using as a math manipulative. Plus, they're shiny, shimmery, and oh so pretty!

DIY metallic dyed mini blocks for kids from And Next Comes L

This post contains affiliate links for your convenience.

To make these DIY metallic dyed mini building blocks, we used:


To dye the blocks, we followed Fun at Home with Kids' instructions from these gorgeous DIY dyed rainbow blocks. After leaving the mini cubes to dry on some paper towel for a few hours, we were left with these itty, bitty metallic blocks.

DIY metallic dyed mini blocks for kids from And Next Comes L

DIY metallic dyed mini blocks for kids from And Next Comes L

Metallic dyed mini blocks - homemade toys for kids from And Next Comes L

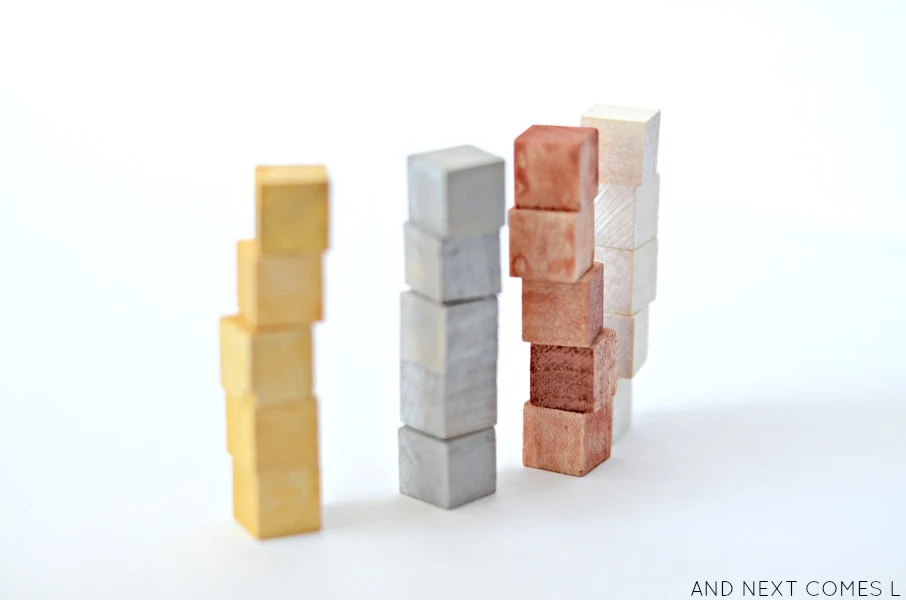
These metallic dyed mini blocks are great math manipulatives, but they are also great for working on fine motor skills while stacking. They can also be used for color sorting activities.

Stacking up metallic dyed mini blocks from And Next Comes L

Building towers with DIY metallic dyed mini blocks from And Next Comes L

Please note that these mini cubes work great for preschoolers and up and are not recommended for children who are still mouthing, especially since the dye is not set.

If you have more mini wooden blocks, then try out these other ideas:


Homemade toys for kids: DIY metallic dyed mini blocks from And Next Comes L
Continue reading "DIY Metallic Dyed Mini Blocks"

Tuesday, January 27, 2015

DIY Wooden Base Ten Blocks

I've always wanted to get some base ten blocks for exploring math at home, but I find the plastic ones kind of...well, ugly. And the foam ones aren't any better. Ideally, I wanted plain wooden base ten blocks, but couldn't find any. Then I found the perfect solution at the dollar store! So here's how I made my own wooden base ten blocks.

DIY wooden base ten blocks for math learning from And Next Comes L

This post contains affiliate links for your convenience.

I chose to only make tens and ones since it would take me forever to make hundreds and thousands. But I may make some in the future. Here's what you'll need to make the ones and tens as pictured above:


To make the ones, you will just use 10 mini wood cubes. No gluing involved. To make the tens, simply hot glue 10 mini wood cubes together until you make a long stick. That's it!

These DIY wooden base ten blocks look so much nicer than the plastic blocks and the foam blocks. They will be a great way to practice counting and place value.

Here are some other great DIY math manipulatives to try:


DIY wooden base ten blocks for math learning from And Next Comes L
Continue reading "DIY Wooden Base Ten Blocks"

Wednesday, January 15, 2014

DIY Road Table With Homemade Wooden Trees

I wanted our light table to become a creative hub for the boys, hoping to spark hours and hours of play.  The light table itself gets used for hours a day, but it's always nice to change things up.  So now our light table is now equipped with some interchangeable tabletops, including this homemade light bright tabletop.  Of course, I didn't stop there.  I just had to make a road map for the boys to drive their cars on.

DIY road table with homemade wooden trees from And Next Comes L

This post contains affiliate links for your convenience.
This road tabletop is also made from 1/4" thick hardboard.  I drew the roads by tracing the width of a level, but you could certainly use whatever you had on hand.  Once I drew my rough road map in pencil, I started painting it with acrylic paint.  After the paint dried, I applied two coats of Mod Podge to seal and protect the roads from future damage.  I finished this project in an afternoon so it is a pretty simple and straightforward project.  And the end result is fabulous!

DIY road table from And Next Comes L

Closeup of DIY road table from And Next Comes L

Of course, a road table needs accessories, like the plastic grass we used as part of the frog pond small world.

Grass on DIY road table from And Next Comes L

But wait.  It needs trees!  I found this DIY Forest tutorial from Inspired by Charm on Pinterest shortly before Christmas and just knew that I had to make a set for the boys to play with.  I chose to stick with earth tones - think shades of green and brown.  They were ridiculously easy to make and the boys love them.  They will be a great addition to all sorts of small world play.

Homemade wooden trees for DIY road table or small world play from And Next Comes L

Homemade wooden trees for DIY road table or small world play from And Next Comes L

Homemade wooden trees for DIY road table or small world play from And Next Comes L

Of course, any good road map will need some cars for driving with, but what about some houses?  No problem!  J built some little houses for our town using our colorful Melissa & Doug wood blocks.  They work great, but I do have plans for some future accessories for this tabletop...just saying.

Block houses and cars on DIY road table from And Next Comes L

Block houses, cars, and homemade wooden trees on DIY road table from And Next Comes L

Since this tabletop fits on top of our light table, I can just remove it when we want to do some light play.  And since this tabletop is only 1/4" thick, I can easily store it under our couch in the playroom.

Be sure to check out the other interchangeable tabletops for our light table:


DIY road table with homemade wooden trees from And Next Comes L
Continue reading "DIY Road Table With Homemade Wooden Trees"