Showing posts with label Proprioceptive Sensory. Show all posts

March 12, 2024

12 Animal Walks for Kids Who Crave Sensory Input

Need ideas to get the kids moving? Try these sensory animal walks for kids. They get kids moving and burning off that excess energy!

Last week we received our first official dump of snow and the cold arctic air came with it. Just like that, we're shoveling snow and bundling up to brave the -30 C wind chills.

Wind chills like that though mean that we can't always spend a lot of time playing outdoors. So it doesn't take long for the kids to get a bit squirrely with our long cold winters.

Thankfully, we can burn off excess energy indoors with these 12 fun animal walks for kids. They're also a great way to provide proprioceptive and vestibular sensory input to my sensory seeking kids.

Simple and fun animal walks for kids that provide lots of sensory input

A version of this post originally appeared on the CBC Parents website.

Why Sensory Animal Walks?

You might be wondering: why do animal walks in the first place?

Well, these silly walks make exercise fun for kids, encouraging them to get creative and engage in some imaginative play, all while burning off excess energy. They're great for rainy or cold winter days or for a quick body break at home or at school.

They are also highly regulating and provide calming sensory input. Specifically, proprioceptive and vestibular sensory input through heavy work (more on that here). In other words, these animal walks help kids receive calming deep pressure to their joints and limbs, help strengthen their sense of balance, and develop body awareness, among many other things.

Animal walks also help develop a child's core strength and muscles.

As an added benefit, animal walks require no additional materials. You simply need some open space, you body, and a little imagination.

Benefits of doing animal walks with your kids

Animal Walks for Kids That Will Get the Kids Moving!

You probably remember doing lots of these animal walks yourself when you were a child, but, in case you need some further inspiration, here are 12 animal walks for kids. They'll be moving and giggling in no time!

1. Frog Hop

The frog hop is a classic animal walk that most kids know how to replicate. Simply square like a frog and hop. Or turn it into a game of leap frog if you have more than one child.

Child doing a frog hop

2. Seal Slide

Personally, I find the seal slide super challenging as an adult so it's definitely a great challenge for the kids too. To do the seal slide, simply lay on your tummy, push your hands up until your arms are straight, and move across the floor while dragging your legs behind you.

3. Penguin Waddle

Who doesn't love penguins? They're so adorable when they walk. Your kids will love pretending to be a penguin too. To do this animal walk, simply keep your arms tight against the side of your body then gently waddle side to side as you walk.

For an added challenge or twist, try and encourage your kids to walk with a penguin egg on their feet. Place a small ball or stuffed animal on top of their feet and see if your kids can waddle across the room without dropping their egg.

4. Snake Slither

Lay on your tummy and wiggle along the floor like a slithering snake. This exercise requires a lot of energy and strength to slither across the floor. It's also hilarious to watch!

5. Bear Walk

Here's a classic animal walk that you might remember from your childhood. Simply walk on all fours like a bear, keeping your arms and legs fairly straight as you walk.

6. Crab Walk

Another childhood classic! This one involves leaning backwards on all fours and walking around backwards.

Child doing a crab walk

7. Kangaroo Jump

Jumping is a great way to burn off loads of energy. To do the kangaroo jump, keep your  legs together, bend the knees a bit, and jump around as high as you can. You could also encourage your kids to hold a stuffed animal in front of them as if they have a kangaroo pouch of their own.

Child hopping like a kangaroo

8. Duck Waddle

Your kids will love pretending to be a duck with this simple duck waddle. To do this exercise, squat, tuck your hands into your armpits to make duck wings, and flag your arms as you walk.

9. Donkey Kicks

Donkey kicks are ideal for kids who are extra energetic. Start by getting on all fours. Then simply kick your legs out and up.

For a fun challenge and twist, stack some pillows or cardboard boxes and use your donkey kicks to knock them over.

10. Inchworm Crawl

Move inch by inch with this silly animal walk. To do it, keep your legs straight, bend down, and place your hands on the ground right in front of your feet. Next, walk your hands out in front of you until you get into a pushup-like position. Then walk your feet up to meet your hands all while keeping your arms and legs as straight as possible.

11. Elephant Walk

This walk is all about swinging your long elephant trunk. To form your trunk, put your arms together in front of your body. Then swing your homemade trunk from side to side as you walk. Don't forget to stomp your feet like big elephants as you walk around!

12. One-Legged Flamingo Hops

This animal walk is great for working on balance because it's all about one-legged hops! To do flamingo hops, stand on one leg, hop, and then land one-legged on the opposite leg.

Sensory animal walks exercises to try with your kids

Some Final Notes & Ideas on Doing Animal Walks

Feel free to get creative and let the kids invent their own animal walks too. Maybe they're want to be dinosaurs or horses or sea creatures next. The possibilities are endless!

You could also try doing competitive animal walks. For example, have a crab walk race and see who can cross the finish line first.

Kids doing animal walk races

Need visuals? Try using this free Google Slides deck of animal walks in teletherapy, at home, or in your classroom.

I hope your kids have fun doing these animal walk exercises!

Simple and fun animal walks for kids that provide lots of sensory input

Continue reading "12 Animal Walks for Kids Who Crave Sensory Input"

June 25, 2020

How to Make a DIY Sensory Tunnel

A simple sensory tunnel DIY tutorial. Below you'll find out how to make your own homemade sensory resistance tunnel out of lycra or spandex.

I have always wanted to sew a sensory tunnel since they are so expensive, especially when you consider the fact that they are just a piece of stretchy fabric.

So me being me (and frugal as can be!), I made mine (as well as the two stretchy resistance bands) for only $25. 

Another bonus of making a sensory tunnel myself? I could make it any color I wanted. Or rather any color the kids wanted. Okay, let's be honest, any color that was on the clearance racks haha

But seriously, even if you don't think you can sew, you can easily managing making this DIY sensory tunnel.

Sensory tunnel autism hack with full tutorial

DIY Autism Sensory Tunnel: What You'll Need

To make a homemade sensory resistance tunnel of your own, you will need:

  • Spandex in the color of your choice - 3 meters long (or approximately 3 yards long) - J picked bright yellow, which is fun, but totally hard to photograph as I discovered...
  • Sewing machine
  • Scissors
Crawling through a lycra sensory tunnel

How to Make a Homemade Lycra Sensory Tunnel

The spandex was a bit too wide to make a good sensory resistance tunnel. So I cut the fabric in a way that it ended up being about 45 inches wide. I intentionally made my tunnel a bit roomy so that it would grow with the boys and also fit an exercise ball through.

1. Cut your fabric so that it's about 3 meters long x 45 inches wide.

2. Fold the fabric in half so that it makes a long rectangle (like pictured below).

3. Use a zigzag stitch to sew the ends of the spandex together. Don't forget to backstitch at the start and the finish. Now the sewing part is relatively easy and straightforward, but it is a lot of fabric to get through the machine - just as a FYI.

And that's it! Easy, right?!

Tutorial for making a sensory resistance tunnel

Ways to Use the Homemade Sensory Resistance Tunnel

The best part about this sensory tunnel is that it is versatile. We use it for so many different activities. 

Obviously we use it as a tunnel, like below, but sometimes I get the boys to crawl through the tunnel while pushing an exercise ball. It's a great heavy work activity!

How to make a sensory tunnel DIY tutorial

We also use it like stretchy resistance bands. Simply stand in the middle of the sensory tunnel, grab each end with your hands, and stretch! Here's J demonstrating:

Playing with a homemade sensory tunnel

The sensory tunnel also doubles as a body sock like this sensory sock. Just climb on in and start making shapes.

Using a DIY sensory tunnel as a body sock

Or play peek-a-boo.

Using a DIY sensory tunnel as a body sock

Seriously...how darn cute is this?!

Playing peek-a-boo with a homemade sensory tunnel

K also likes to wrap himself up like a mummy and walk around. Banana man returns (see reference)! And sometimes the boys will climb into different ends to make a double body sock.

Using a homemade sensory tunnel as a body sock

We also use our homemade sensory tunnel as a toy trampoline, which was an idea that I got from the book Motivate to Communicate: 300 Games & Activities for Your Child with Autism. The boys grab some stuffed animals, grab the ends of the tunnel, and shake it like a parachute.

Sensory tunnel tutorial and play ideas

Sensory tunnel tutorial and play ideas

We also like to use it as a sensory swing. My husband and I just grab each end of the tunnel, pick it up, and gently swing it back and forth. Sometimes, if I'm feeling like a good workout, I grab both ends myself so that the boys have to curl their body into a V shape and spin them around for a bit. J particularly loves doing that!

Using a DIY sensory tunnel as a sensory swing

And finally, here are some other suggestions:

  • Play tug of war. Two people grab opposite ends of the sensory tunnel and pull back and forth
  • Create a high jump or limbo bar with it. Two people hold each end, lower and raise it, while encouraging the kids to jump over, crawl under, roll under, etc. It's a great way to work on the words "over" and "under."
  • If you have a smooth soft surface like some tumbling gymnastic mats, then you can have your child climb into the sensory tunnel or lay on top, then pull them across the mats. It's sort of like riding a magic carpet!

Other DIY Sensory Tools & Hacks You'll Love


Homemade sensory tunnel - a simple DIY tutorial for how to make your own out of lycra
Continue reading "How to Make a DIY Sensory Tunnel"

January 17, 2020

DIY Snowman Stress Balls

Looking for DIY stress balls for kids? Then try making these homemade snowman stress balls this winter!

Stress balls are a great tool for kids.

Sure, they can be used as a fidget at home or in the classroom, but they can also be great for self regulation, building hand strength, providing proprioceptive sensory input, and more.

While there are lots of different options of stress balls available on the market, they're actually really easy to make yourself. And the great part about making your own is that you get to customize them to fit your needs or tailor them to a specific theme. For instance, you can fill them with different textures and/or make them any color you want!

Since it's winter and all, though, I thought it would be fun to make some snowman stress balls for my boys to squish and squeeze. And they turned out really cute!

How to make DIY snowman stress balls for kids

A version of this post originally appeared on the CBC Parents website.

DIY Snowman Stress Balls: What You'll Need

It's so easy to make your own stress balls at home. Here's what you'll need:

  • White balloons - We're making snowman stress balls here so we need white balloons to represent snow.
  • Permanent markers, in black and orange - To draw the little snowman details onto the balloons.
  • Funnel - To make it easier to get the materials into the balloons. You'll need to make sure that whatever materials you are using to fill the balloons will fit through the hole in your funnel.
  • Materials to fill the balloons - You can use rice, epsom salt, play dough, aloe vera gel, beans, water beads, lotion, corn starch, flour, or anything similar. Since I made three stress balls, I used three different fillers: rice, epsom salt, and aloe vera gel.

Once you have everything gathered, it's time to make the stress balls.

Materials you'll need to make a snowman stress ball

How to Make a Stress Ball that Looks Like a Snowman

First, we need to fill the balloons. To do so, simply slide the end of the balloon onto the funnel and start adding your fillings into the balloons via the funnel.

However, if you are using a liquid such as aloe vera gel and the bottle has a pump, you can skip the funnel. Instead, simply slide the end of the balloon onto the end of the pump. Then you can pump the liquid directly into the balloon!

Once you've filled the balloons with the fillers of your choice, tie the end of the balloon. Make sure it's securely knotted.

Next, draw a snowman's face on the stress ball using permanent markers. Be sure to let the marker dry fully before squeezing. Otherwise, the color may rub off onto your hands.

I ended up making three snowman themed stress balls for my kids. In one, I used rice. In another, I used epsom salt. And, in the third, I used aloe vera gel. Here's how the turned out:

DIY snowman stress balls for kids

Then that's it. They're now ready for squishing and squeezing.

Closeup of a child holding a homemade snowman stress ball

Homemade Snowman Stress Balls for Kids

When it comes to deciding what to put inside, you might want to experiment with a variety of textures to see which ones you and your kids prefer.

Personally, I enjoyed the feel of the epsom salt one the best.

My kids, on the other hand, really liked the aloe vera gel one. It was definitely their favorite! Although, if you have younger kids, you might want to avoid using aloe vera because if they squeeze it too hard, it may explode and get everything.

Closeup of a child holding a homemade snowman stress ball

My boys thought it was hilarious to squish and squeeze the snowmen's faces! They got a really good chuckle out of it.

Closeup of a child squishing a DIY snowman stress ball

Closeup of a child squishing a DIY snowman stress ball

Homemade stress balls likes these are great for strengthening hands and providing proprioceptive sensory input. They make a great fidget for kids and are useful to include in a calm down kit.

Closeup of a child squishing a DIY snowman stress ball

Do you think your kids would enjoy making their own snowman stress balls like these? Or would these DIY Pokemon stress balls be more their style?

How to make DIY snowman stress balls for kids

Continue reading "DIY Snowman Stress Balls"

January 15, 2020

Valentine's Day Gross Motor Activities

This collection of gross motor Valentine's Day activities for kids is so fun and so inexpensive. All you need is something from the dollar store!

With my oldest back in school, I'm trying to avoid falling into a rut again with my four year old. He really doesn't like to play at home without his best buddy, so it's hard to find activities that he will actually engage in.

So after dropping J off at school, we made a quick stop at the dollar store to find some fresh inspiration.

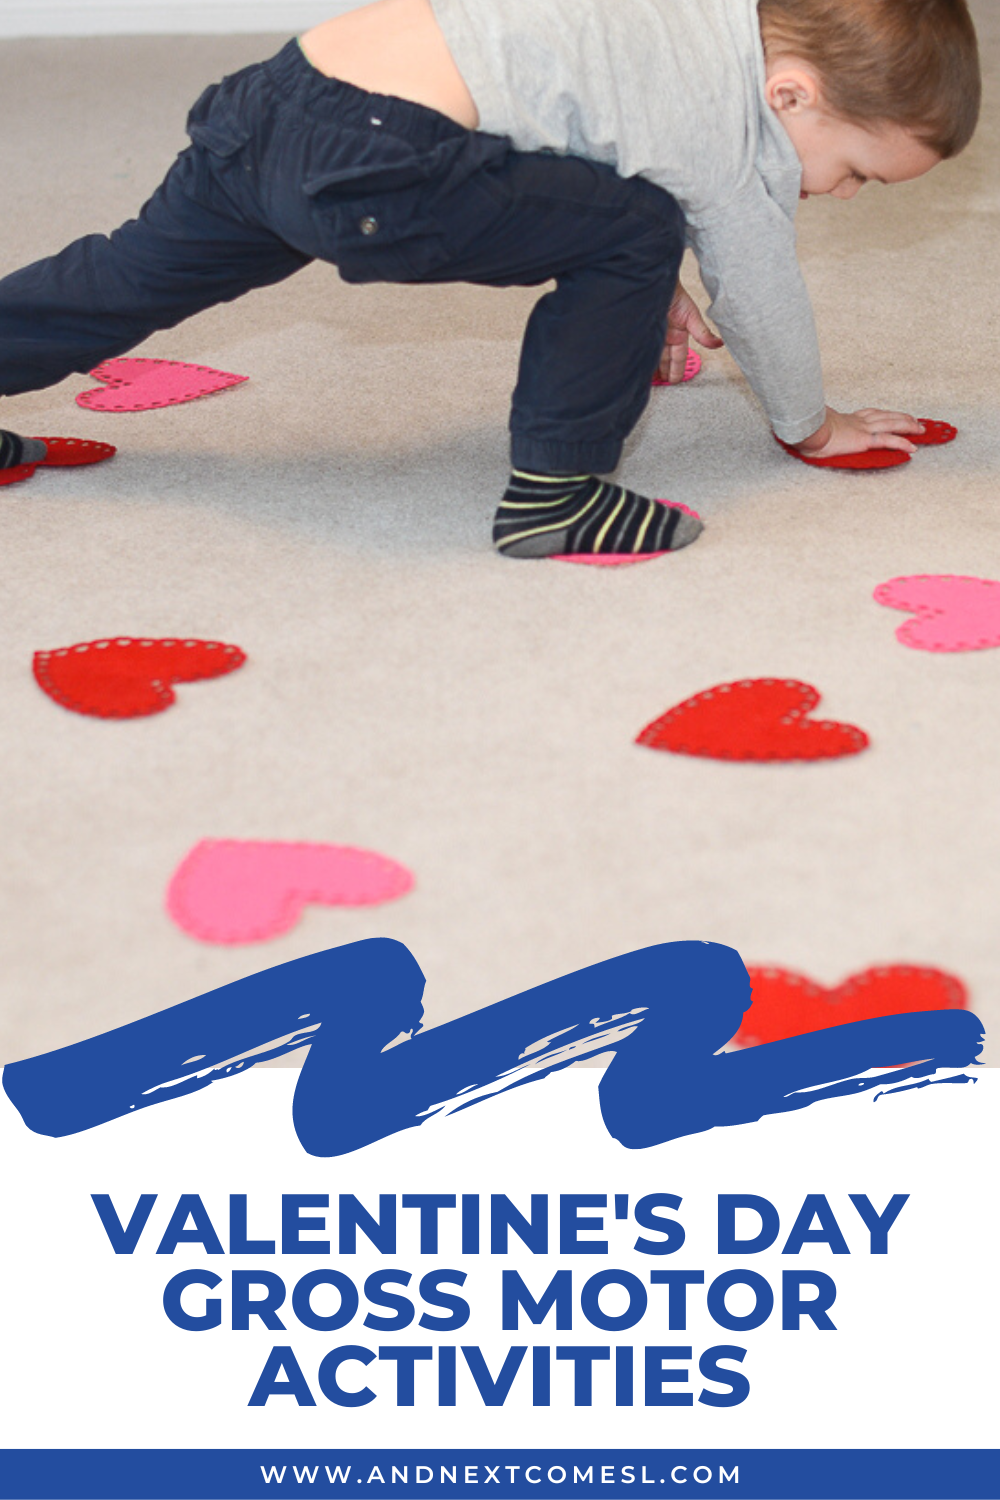
We ended up coming home with a package of felt hearts and spending hours playing and moving with them. The end result is this set of Valentine's Day gross motor activities.

There's zero prep (score!) involved here. Just tons of gross motor play, which is exactly the type of activity my four year old K needed!

Valentine's Day gross motor activities for kids - simple no prep fun using items from the dollar store

Valentine Gross Motor Activities for Preschoolers: What You'll Need

Here's what you'll need for these Valentine's Day themed gross motor games:

  • Large felt hearts (or similar) from the dollar store - You could substitute foam hearts, paper hearts, or even cut out your own heart shapes from felt.

When I picked up a package of felt hearts from our trip to the dollar store, I didn't really know what I was going to do with them. But I figured that I would eventually come up with something.

Obviously I did. You're reading about it after all!

What I loved even more though was that my son created his own fun variations of my original idea.

Easy, Peasy Gross Motor Activities for Valentine's Day Using a Package of Hearts

To play, we started off by scattering the hearts on the floor. We set them a fair distance apart to encourage jumping and large steps. 

For extra fun, I told my four year old that the carpet was lava and he had to only touch the hearts. He's really into the whole "the floor is lava" stage of childhood so he loved this suggestion of mine.

Close up of a preschool child jumping on hearts as part of a Valentine's Day activity

Close up of a preschool child stepping on pink and red hearts as part of a Valentine's Day activity

Then, instead of stepping from heart to heart, we varied things up. He tried hopping on one foot from heart to heart. Then he practiced double footed jumps, like below.

Child jumping over red and pink felt hearts

Child jumping to red and pink felt hearts

Another way to play is to move from heart to heart on all fours, only letting one body part touch a heart at a time. Kind of like a moving game of Twister, I guess? Anyway, it was a great way to stretch the body and get my son moving. You can see it in action in the video that's included elsewhere in this post.

Preschool child playing twister like game with felt hearts as part of a Valentine's Day gross motor activity

Preschool child playing twister like game with felt hearts as part of a Valentine's Day gross motor activity

Child with hands and feet on red and pink felt hearts as part of a Valentine's Day gross motor activity

Child with hands and feet on red and pink felt hearts as part of a Valentine's Day gross motor activity

Even More Valentine's Day Gross Motor Activities to Try

Finally, here are some other ways to play with these felt hearts:

  • Arrange the hearts in a snake-like shape to create a game board. Roll a die and use your feet as game board pieces to move from the start to the finish line.
  • Arrange the hearts to make a hopscotch game. You could label the hearts with numbers if you wish. 
  • Make a tic tac toe grid on the floor using tape. Play tic tac toe with the felt hearts instead of X's and O's. One person uses one color of hearts while the other person uses the other color. 
  • Arrange the felt hearts into a tight grid, sort of like a Twister game board. Then grab a die. Depending on what number you roll on the die, that's what body part you place somewhere on the hearts. You can only use one body part per heart though! We used the following:
    • Roll a 1 = Place your head on a heart
    • Roll a 2 = Place your left hand on a heart
    • Roll a 3 = Place your right hand on a heart
    • Roll a 4 = Place your left foot on a heart
    • Roll a 5 = Lift your head up from the hearts
    • Roll a 6 = Kid's choice

Regardless of what variation you try, your toddlers and preschoolers are going to have a blast with these Valentine's Day gross motor activities. Which variation will you try first?

Valentine's Day gross motor activities for kids - simple no prep fun using items from the dollar store

Continue reading "Valentine's Day Gross Motor Activities"

November 29, 2019

DIY Crash Pad {An Easy No Sew Sensory Hack}

DIY crash pad tutorial. Find out how to make a crash mat using materials you have around your home. No sewing involved either!

I have been wanting to make a gigantic crash mat for my kids for quite some time. However, the thought of sewing a large piece of fabric and hunting down enough foam to stuff it with seemed too daunting. It also sounds ridiculously expensive! 

But I finally came up with the perfect inexpensive solution for making your own homemade crash mat.

It's frugal to make because you likely already have everything on hand to make it. Ready to find out how to make it?

Homemade crash pad for kids: an easy tutorial for how to make your own crash mat

Why Crash Mats are Great for Kids with Autism & Sensory Processing Disorder

Crash mats are great for kids, especially those with autism and/or sensory processing disorder, because it provides lots of proprioceptive input and deep pressure.

It's also a great way to burn off excess energy when the kids are stuck indoors. Jump. Crash. Repeat.

But if you have ever priced out a crash mat (like this one), then you know they're super expensive! And I'm entirely too cheap to buy one, so I came up with this perfect DIY alternative. There's no sewing involved too (bonus, right?).

DIY crash mat - find out how to make a homemade crash pad for kids

Homemade Crash Pad: What You'll Need

Do you use a duvet on any of the beds in your house? Well, then you are ready to go!

To make this no sew DIY crash mat, you will need to gather as many of the following supplies as possible:

  • Duvet cover (ours is queen sized) that is sealed with a zipper (similar to this one) - required material
  • Duvet(s)
  • Pillows
  • Body pillow
  • Large comforters, blankets, or fluffy towels
  • Large stuffed animals (avoid ones with any plastic parts)
  • Bean bag chairs
In the past, we have always just piled up stuffed animals, pillows, and blankets to make a giant crash mat. The problem with this method, however, is that all the materials shift, meaning we would constantly have to readjust the items.

We needed something that would hold all the items in one place.

The solution?

A duvet cover that zips closed!

How to Make a Crash Mat

Simply unzip the duvet cover and stuff it as full as you can with everything soft and fluffy in your house.

We used primarily pillows, fleece blankets, two bean bag chairs, a body pillow, and a large stuffed tiger that is bigger than I am!

Fun tip: You can even make it into a scavenger hunt and encourage the kids to help you locate everything you could use.

Make your own crash mat at home

Making Your Own Crash Mat is a Great Heavy Work Activity Too!

Stuffing the duvet cover is a great heavy work activity for kids too because they have to climb inside the duvet cover with a large item and stuff it into the corners.

Another fun tip: the duvet cover makes a fun fort! I held the opening of the duvet up so that the boys could climb in and out to fill it up. 

Once it's full, simply zip it closed and let the kids crash! It worked perfectly!

Crashing into a homemade crash mat

How to make a crash mat for kids using materials you have at home

Other Sensory Hacks You'll Love


DIY crash pad for kids: an easy no sew tutorial for how to make a homemade crash mat
Continue reading "DIY Crash Pad {An Easy No Sew Sensory Hack}"

August 16, 2019

How to Make a DIY Lycra Sensory Bed Sheet

Lycra sensory sheets are super easy to make. Use this tutorial to learn how to make your own DIY compression bed sheet for cheap!

I had been debating for months whether or not to sew a weighted blanket for my son before deciding to try making my own sensory bed sheets. I mean one look at the DIY weighted blanket tutorials and I'm like heck no, too much work. Plus, polyfill pellets are expensive!

So me being me, I figured that I could make one for super cheap.

And I did (obviously).

However, before I splurged on some fabric for making some a homemade compression sheet, I wanted to make sure my son would actually like the idea of it. I took our homemade sensory tunnel, which just happens to be the same length required to wrap around my son's mattress, and tried it as a temporary sensory sheet. It worked really great!

So I decided that it was worth making a trip to the fabric store and finally making a legit DIY lycra sensory bed sheet for him.

DIY compression sheet: how to make a lycra bed sheet for kids with autism or sensory processing disorder

About this Homemade Lycra Compression Sheet for Kids

The inspiration for this project is this stretchy lycra sheet that costs $70! Geez, that's a lot of money, isn't it?

Thankfully, my final price tag was $15.

Yes, FIFTEEN dollars.

Much better price, right?

How to Make the DIY Sensory Sheet

First, I measured the entire dimension of my son's mattress, top, bottom, and sides included (it was 120 inches). Then I converted it to metres so that I knew how much fabric to purchase. I needed the exact same amount of fabric that I used to make our sensory tunnel: 3 metres (which is about 3.3 yards). 

However, in the end I had to cut off about a foot to a foot and a half off to make it tight enough to provide good sensory input to my son. 

So K and I headed to the fabric store to look for something in the clearance section. 

I was looking for stretchy and cheap. I didn't care what color it was as long as the price was right. It also didn't have to be lycra as any stretchy fabric would work. 

I ended up searching and searching and finally found this peach cotton spandex blend for 70% off. So I paid $15 for 3 metres of fabric and I was happy as a...wait for it...yes, as happy as a peach.

At first I thought the color was hideous, but it's kind of grown on me, to be honest.

How to Sew Your Own Lycra Compression Bed Sheet

To sew the stretchy sheet, it's just like sewing the sensory tunnel or stretchy resistance bands

Simply take the two ends of the fabric and zig zag stitch them together to create a giant sleeve. 

Yep, that's seriously it! 

Remember, you can use any kind of lycra or spandex material for this project as long as it's nice and stretchy.

Homemade DIY stretchy sensory sheets for kids with autism or sensory processing disorder from And Next Comes L

How to Use the DIY Sensory Sheet

Using the DIY sensory sheet is straightforward. Simply slide the stretchy sheet onto the mattress. Nice alliteration there too, eh?

I know it sounds easy, but try putting it on a regular mattress on the bottom of a bunk bed when room is limited...It's a bit challenging, especially if the sensory sheet is snug. You'll work up a sweat and say a few curse worse in the process, I'm sure.

Then climb in underneath for a calming night of sleep! Awww, you can sense it can't you?

Homemade DIY stretchy sensory sheets for kids with autism or sensory processing disorder from And Next Comes L


Homemade DIY stretchy sensory sheets for kids with autism or sensory processing disorder from And Next Comes L

Hope you found this tutorial helpful. I've got tons of other great sensory hacks just like this.

Other Ideas You'll Love


Sensory sheet DIY: how to make a DIY lycra compression bed sheet for kids
Continue reading "How to Make a DIY Lycra Sensory Bed Sheet"